Adding Model Providers to GitHub Copilot and VS Code
In this article
Adding Model Providers to GitHub Copilot and VS Code
The default Copilot experience picks a model for you, and for most work that is fine. But there are good reasons to bring your own: you want a specific frontier model, you need to keep traffic inside your own Azure tenant, you want to run something locally and offline, or you just want to evaluate a new model without waiting for it to show up in the built-in list. Both the GitHub Copilot app and VS Code support this through what is called Bring Your Own Key, or BYOK. This post covers how to add providers in each, and what to keep in mind.
The Idea: Bring Your Own Key
BYOK lets you connect to a model provider using your own API key while still using the Copilot chat experience and tools. Your key stays private and requests go straight to your provider, which means you also control and monitor the usage directly on their billing, not Copilot's.
BYOK models work without signing into a GitHub account and without a Copilot plan. That is what makes fully offline, local-model workflows possible. The tradeoff is that some features still lean on the Copilot service. Semantic search, inline code completions, and anything that depends on embeddings still need a GitHub account. BYOK applies to the chat experience and background utility tasks.
In the GitHub Copilot App
The Copilot app exposes this directly under Model providers. You add a provider, drop in your key, and it appears alongside the built-in models. The panel lists a set of providers to choose from:
| Provider | What it connects to |
|---|---|
| Anthropic | Hosted Claude models over the Messages API |
| Azure OpenAI | Service deployments via your resource host, API version, and per-model deployment names |
| Custom endpoint | Any OpenAI-compatible HTTP endpoint (vLLM, OpenRouter, a fine-tune, etc.) |
| Foundry Local | A local runtime with no API key, over an OpenAI-compatible endpoint |
| Microsoft Foundry | OpenAI-compatible endpoints, defaults to the Responses API for GPT-5 |
| Ollama (local) | A local runtime with no API key, over the OpenAI-compatible /v1 endpoint |
| OpenAI | Hosted models over the completions API |
Hosted providers ask for an API key, Azure asks for your resource endpoint and deployment details, and local runtimes like Ollama and Foundry Local need no key at all because they run on your machine. The note at the top of that panel says it plainly: your keys stay private and go straight to your provider.
In VS Code
VS Code puts the same capability behind the Language Models editor. Open the model picker in the Chat view and select Manage Language Models (the gear icon), or run Chat: Manage Language Models from the Command Palette.
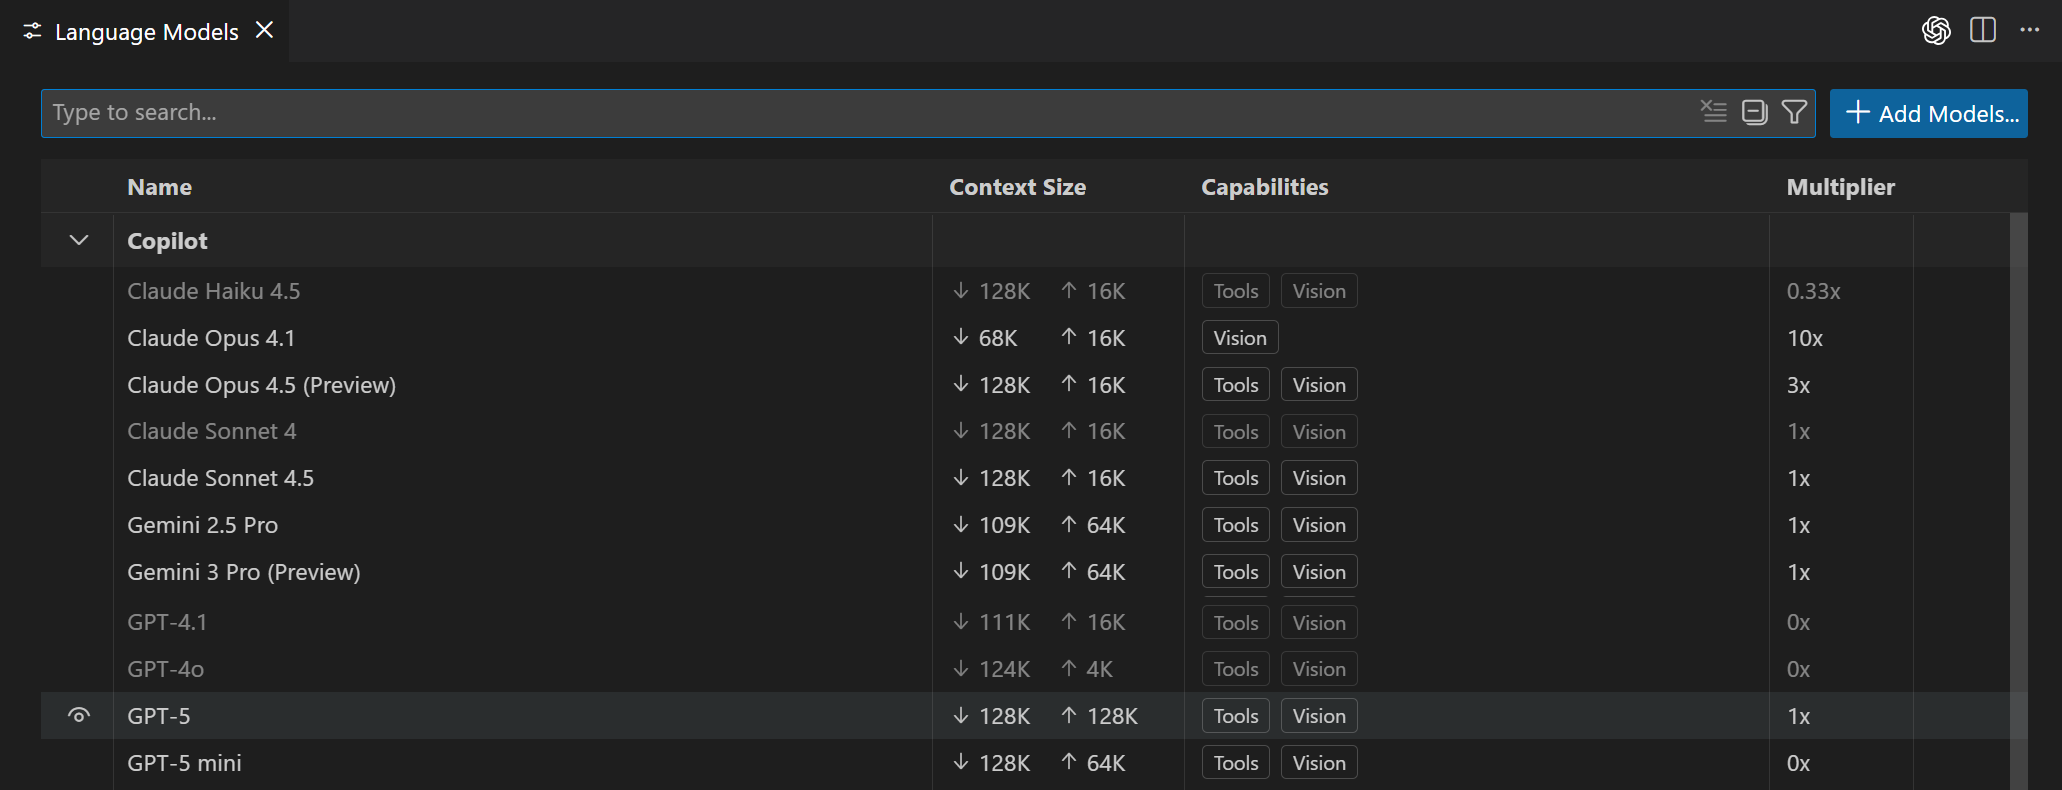
There are three ways to add models.
1. A built-in provider
VS Code ships ready-to-use providers: Azure, Anthropic, Gemini, OpenAI, and others. Select Add Models, pick the provider, give the group a name, and enter the key or endpoint.
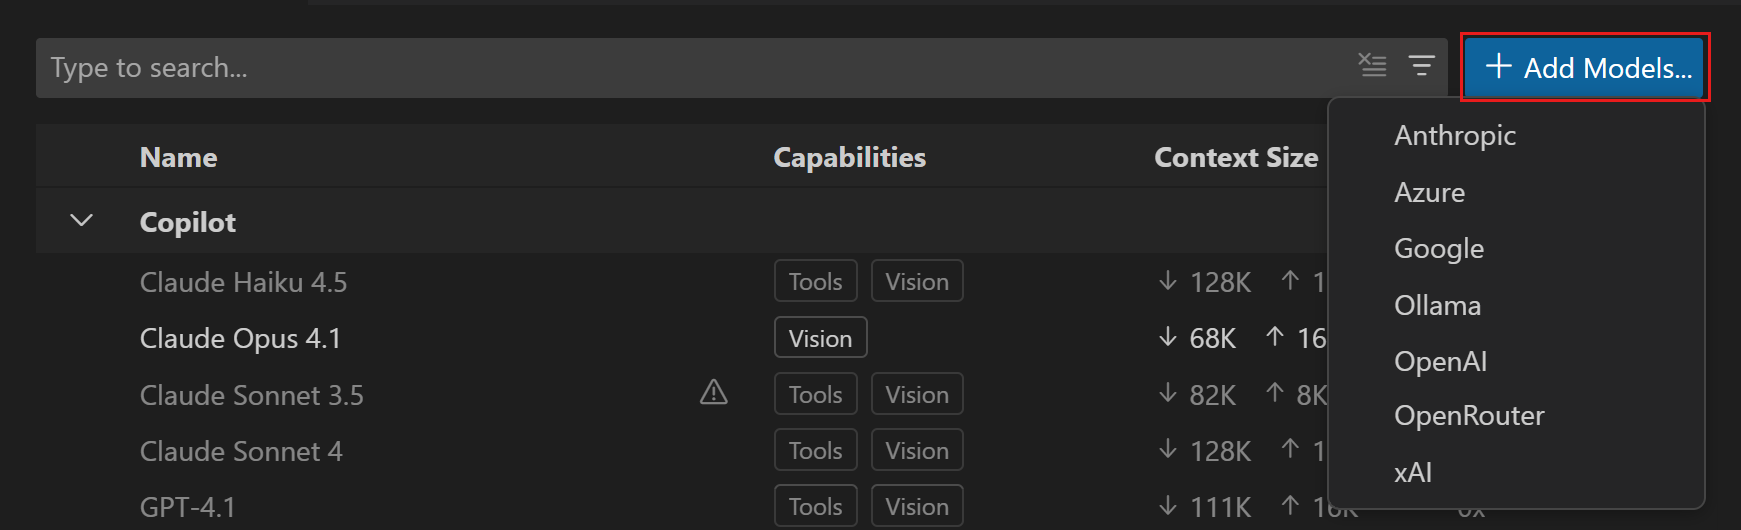
For Azure OpenAI, VS Code drops you into a chatLanguageModels.json file where you point at your deployment. The id is the deployment name and the url is your resource endpoint:
[
  {
    "name": "Azure",
    "vendor": "azure",
    "models": [
      {
        "id": "<my-deployment-name>",
        "name": "GPT-5.5",
        "url": "https://<my-endpoint>.openai.azure.com",
        "toolCalling": true,
        "vision": true,
        "maxInputTokens": 200000,
        "maxOutputTokens": 64000
      }
    ]
  }
]
2. A custom endpoint
The Custom Endpoint provider connects any compatible API to VS Code chat. It supports three API types you pick per model: Chat Completions, Responses, and Messages. This is how you reach a self-hosted model (vLLM), an aggregator (OpenRouter), or an Anthropic endpoint directly. The Messages-API shape for Anthropic looks like this:
[
  {
    "name": "Anthropic",
    "vendor": "customendpoint",
    "apiKey": "YOUR_API_KEY",
    "apiType": "messages",
    "models": [
      {
        "id": "claude-sonnet-4-6",
        "name": "Claude Sonnet 4.6",
        "url": "https://api.anthropic.com/v1/messages",
        "toolCalling": true,
        "vision": true,
        "maxInputTokens": 200000,
        "maxOutputTokens": 64000
      }
    ]
  }
]
3. A model provider extension
Some providers come as marketplace extensions. Select Install Model Providers in the Language Models editor, or search @tag:language-models in the Extensions view. The AI Toolkit / Foundry Toolkit extension, for example, adds Foundry's local and cloud-hosted models. One change worth flagging: the built-in Ollama provider is deprecated, so for local Ollama models install the official Ollama extension instead.
A Few Things That Trip People Up
- Tool calling is required for agents. If a model does not support tool calling, it will not show up in the model picker when you are in an agent session. Set
"toolCalling": trueand make sure the underlying model actually supports it. - Context window math.
maxInputTokensplusmaxOutputTokensmust not exceed the model's real context window. VS Code adds them to show context usage, so set input to the window size minus your output budget. - Business and Enterprise need a policy toggle. If you are on Copilot Business or Enterprise, an admin has to enable the "Bring Your Own Language Model Key in VS Code" policy on GitHub.com before you can add keys.
- Local models for utility tasks. If you go fully BYOK without a GitHub account, the built-in utility models (title generation, commit messages) are not available. Point
chat.utilityModelandchat.utilitySmallModelat a local model to restore them. - Responsible AI filtering. When you use your own model, output comes straight from the provider and may bypass Copilot's responsible AI filtering. That is a feature if you need raw provider behavior, and something to be aware of otherwise.
Reference: AI language models in VS Code and Get started with AI models in Copilot Chat.
Why Bother (the FinOps Angle)
Bringing your own provider changes who bills you and gives you levers that matter at scale:
- Cost visibility. Usage lands on your provider's bill, tagged to your account, so you can actually see and attribute it rather than having it disappear into a flat Copilot seat fee.
- Model tiering. You can set up a cheap local or small model for routine work and reserve a frontier model for the hard tasks, which is exactly the model-routing discipline that keeps AI spend under control.
- Data residency. Routing through your own Azure OpenAI deployment keeps traffic inside your tenant and region, which matters for regulated workloads.
As more of your tooling becomes a token meter behind a subscription, controlling where the tokens go is part of governing the spend. I covered that dynamic in Why AI Cost Optimization Is Different from Traditional FinOps.
Where to Start
- Pick one provider you already have a key for (Azure OpenAI is the natural choice for Azure users) and add it in VS Code through Manage Language Models.
- Try a local model. Install the Ollama extension, pull a small model, and confirm you can chat fully offline.
- If you are on Business or Enterprise, check with your admin about the BYOK policy before you expect keys to work.
The built-in Copilot models are a fine default. BYOK is there for when "fine" is not enough, when you need a specific model, your own billing, or your own tenant.
Related reading
Part of an ongoing thread on AI for Azure practitioners: